How to Create a Calendar Template in InDesign
Step 1: Set Up Your Document
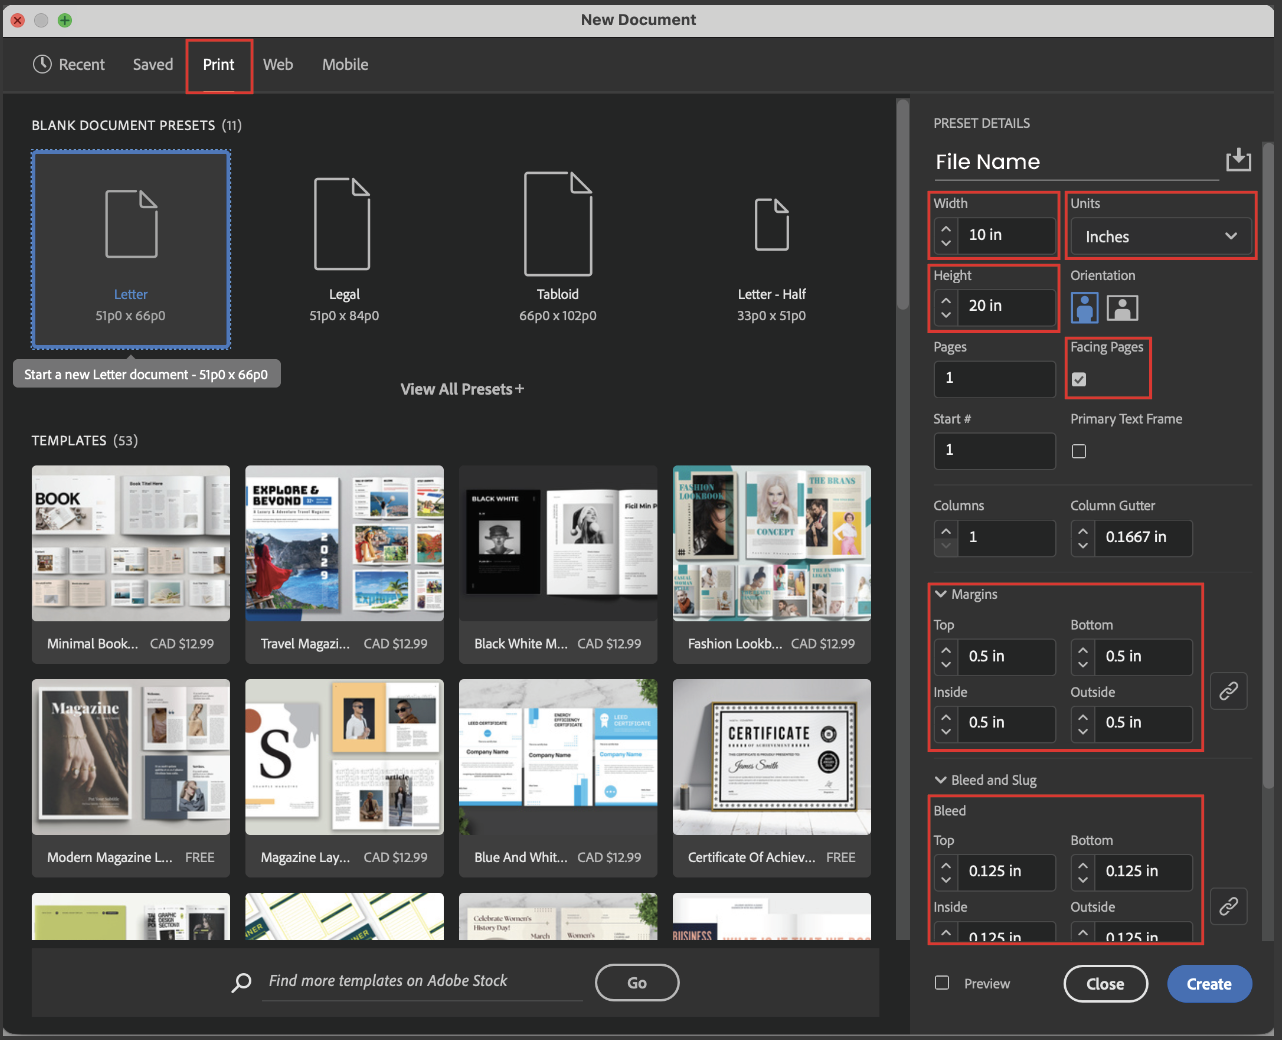
- Go to File > New > Document to open the New Document window.
- Set your dimensions (for a traditional folded 10″ x 10″ wall calendar, use
20 inches height by 10 inches wide). - Uncheck Off Facing Pages so you are working with single pages instead of spreads.
- Set Margins to 0.5″ on all sides and Bleed to 0.125″ on all sides for full-bleed imagery, then click Create.
Step 2: Build the Calendar Grid on Parent Pages
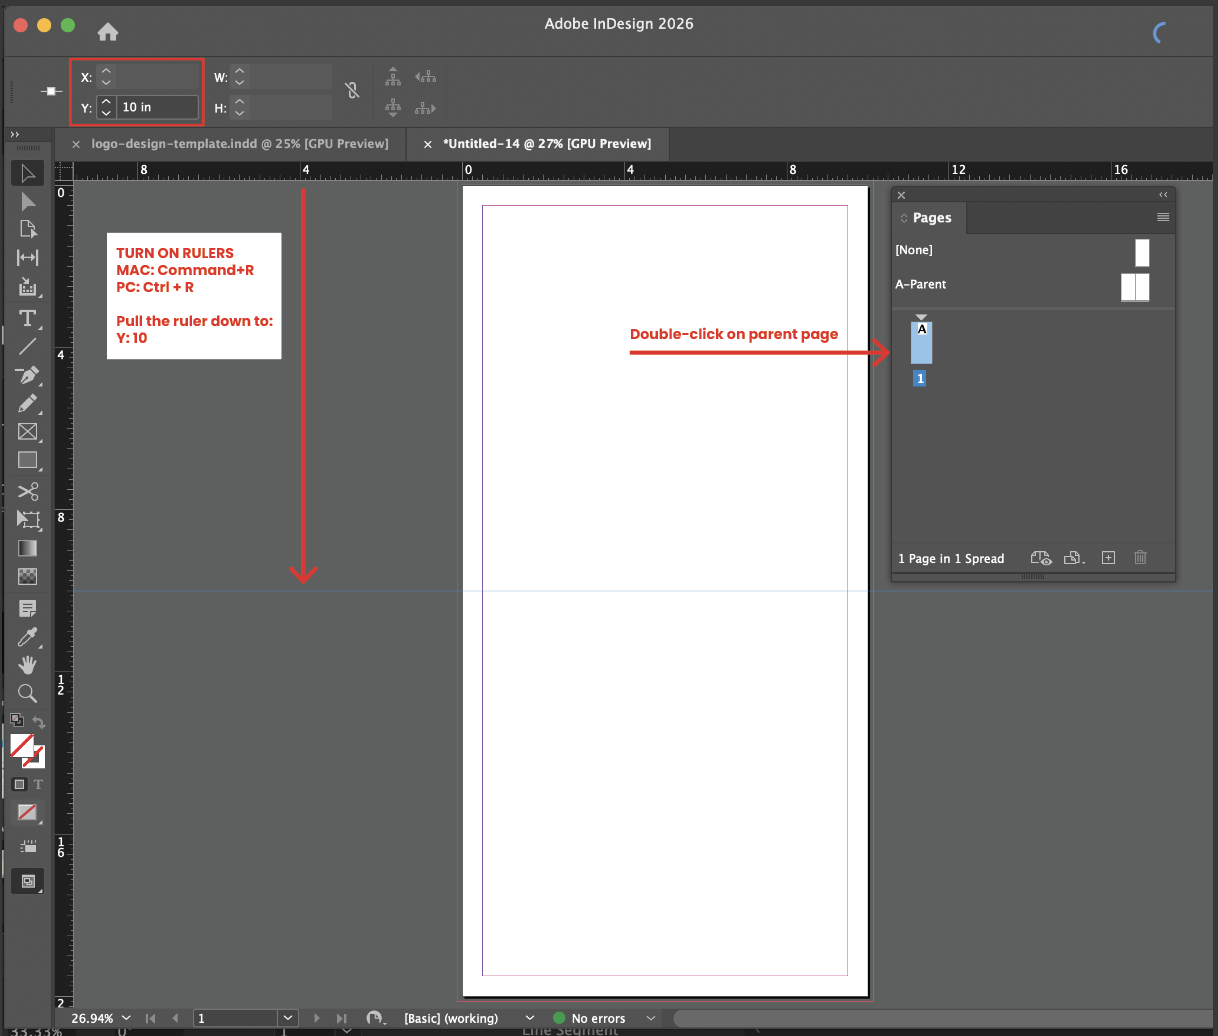
- Open the Pages panel (Window > Pages) and double-click A-Parent.
- Turn on rulers (View > Rulers) and drag a guide from the top ruler down to the 10″ mark (halfway down) to indicate where the calendar folds.
- Go to Table > Create Table and set up 1 Header Row, 5 Body Rows, and 7 Columns (for Sunday through Saturday). Click OK and drag to place the table on your page.
- Resize rows (using the Type Tool) as needed (making the header row smaller for the days of the week).
- Type the days of the week into the header row, center-align the text, and style your table and cells using Table Styles and Cell Styles (Window > Styles).
Step 3: Add and Format Automatic Dates
- Double-click the first data cell of your table and go to Type > Bulleted & Numbered Lists > Apply Numbers.
- Type a space to generate the initial number (“1.”).
- Open the Properties panel (Window > Properties), locate Bullets and Numbering Options, and change the Numbering Style from ^#.^t to ^# to remove the period after the number.
- Customize the font size and cell padding via your Cell Styles panel.
- • 5. Copy the first styled cell, select all the remaining calendar cells, and Paste to fill the grid with an automatic sequence of numbers.
Step 4: Add Imagery and Placeholders
- Use the Text Tool to add a placeholder month name (like January).
- Use the Rectangle Frame Tool (F) to map out the image area on the top half of the calendar.
- • 3. Select the frame, go to File > Place, and choose your image. Double-click inside the frame to adjust or scale the image contents.
Step 5: Adapt and Reuse for Additional Months
- In the Pages panel, click Create New Page to add subsequent months using the Parent Page template.
- Hold Shift + Command (Mac) or Shift + Control (PC) to override and select parent elements on your active page.
- Update the month name and swap out the top image.
- • 4. Highlight and Delete any leading or trailing date numbers that fall outside the current month. The remaining numbers will automatically stay in sequence.
Step 6: Save Your Work
- Save as a standard InDesign project (INDD) or choose InDesign Template (INDT) from the Save dialog format options to preserve your master layout for future use.
What to Submit
- Packaged InDesign Files: A fully packaged folder containing the
.indddocument, all linked images/graphics, and used fonts to ensure the project opens correctly without missing asset links. - Exported Print-Ready PDF: A properly exported PDF version of the calendar layout, maintaining proper page dimensions, margins, and the required 0.125″ bleed.
Reference: https://design.tutsplus.com/tutorials/how-to-create-a-calendar-template-in-indesign–cms-33886